Animation Class
In previous article we saw how we can use AnimationController to make animation. But it has some limitation.
- You cannot use any other data type other than double in lowerBound and uppberBound.
- You cannot specify a curve for animation progress. That means all your animation is linear.
- AnimationController alone is not enough to apply more than one animation on a widget. Animation class helps you to define multiple animation on the same widget.
The class Animation allows us to use data type other than double and also we can specify the animation curve. For example the class Animation allows us to generate intermediate colors between two colors.
The Animation objects are generated using the Tween class.
Tween
Tweens are one of the most critical concepts in Flutter animations or in other words, to animating anything in Flutter. Tweening stands for inbetweening. To understand what that means, look at the image below:
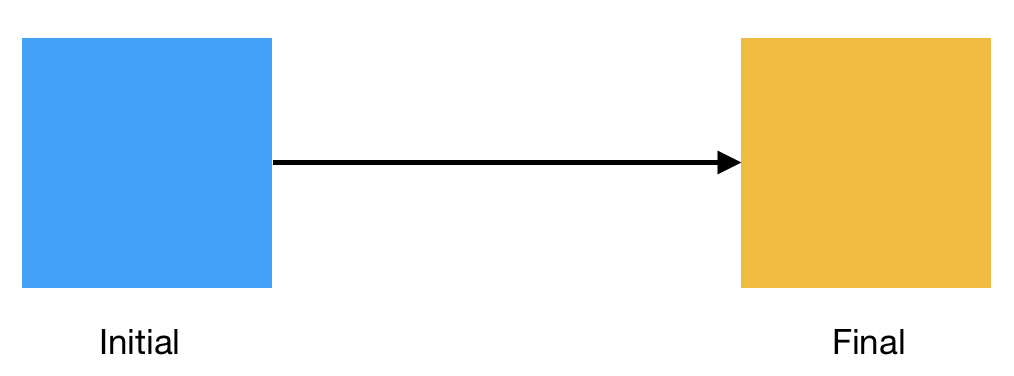
We have a box with a blue background initially and we need to animate it to change the color to yellow. Now, an abrupt color change looks terrible to the user. The change has to be smooth. However, it is impossible for us to show all colors that lie between. In such cases, we create a ColorTween, which gives us all the values in between blue and yellow so that we can display them.
Simply put, a Tween gives us intermediate values between two values like colors, integers, alignments and almost anything you can think of. Just like AnimationController generate values between two double values, Tween is similar to that, but Tween supports other data type like Colors, EdgeInsets, Offset, Size, TextStyle etc. Tween also lets you specify the animation curve.
The Tween constructor takes two parameter, one is begin another is end:
Animation<double> animation;

_animation = Tween<double>(begin: 0.0, end: 100.0).animate(_controller);
In the above example, the statement Tween<double>(begin: 0.0, end: 100.0) creates a Tween object. This object connot be assigned to Animation object directly. To use a Tween object with an animation, call the Tween object's animate method and pass it the Animation object.
To create a color tween, use ColorTween class. Here is an example:
Animation<Color> colorAnimation;
colorAnimation = ColorTween(begin: Colors.blue, end: Colors.yellow).animate(_controller);
But how Animation and Tween works with the AnimationController?
We have created tween and called its animate method and passed the animation controller. The animate() method returns an animation object and gets assigned to the Animation object. This animation object updates its value automatically at each tick when the Ticker sends a signal. The controller also itself update its own value at each ticker signal from lowerBound to upperBound, and as we have passed the controller to the Tween class, the Tween class uses this controller to get the Ticker signal and updates the intermediate value that lies between begin and end. That means you can create multiple Animation object with the same controller and each Animation object will update its value at each ticker signal. That means from each Animation object you will also get its corresponding value.
_controller.value;
animation.value;
colorAnimation.value;
Now we can assign that value to the widget and call setState() method to update the widget at each ticker signal.
Example
Lets consider the example from the article AnimationController, we will use Animation and Tween class along with AnimationController to apply multiple animation on the box.
class _TestState extends State<Test> with SingleTickerProviderStateMixin{

  AnimationController _controller;
  Animation<double> opacityAnimation;
  Animation<double> widthAnimation;

  @override
  initState(){
    super.initState();
    _controller = new AnimationController(
      duration: const Duration(milliseconds: 1000),
      vsync: this,
    );
    opacityAnimation = Tween<double>(begin: 0.0, end: 1.0).animate(_controller);
    widthAnimation = Tween<double>(begin: 0.0, end: 100).animate(_controller);

    _controller.addListener((){
      setState((){});
    });

    _controller.forward();

  }

  @override
  dispose(){
    _controller.dispose();
    super.dispose();
  }

  @override
  Widget build(BuildContext context){
    return BeautyBackground(
      child: Column(
        children: <Widget>[
          BackButton(),
          Expanded(
            child: Center(
              child: SizedBox(
                width: (widthAnimation.value == null) ? 0.0 : widthAnimation.value,
                height: 100,
                child: Opacity(
                  opacity : (opacityAnimation.value == null) ? 0.0 : opacityAnimation.value,
                  child: DecoratedBox(
                    decoration: BoxDecoration(
                      color: Colors.pink,
                    ),
                    child: SizedBox(
                      width: double.infinity,
                      height: double.infinity
                    ),
                  )
                ),
              ),
            )
          ),
        ]
      ),
    );
  }
}
In the above example, we have created two Animation object. At each ticker signal, these two Animation object will update its value and then will call the attached listener. The listener calls setState() which causes the widget to rebuild itself. The Widget gets the width and opacity value from the animation object. The following statement is necessary:
width: (widthAnimation.value == null) ? 0.0 : widthAnimation.value
Initially when the build function runs, at very first time the Animation object contains null value, if you assign the animation value directly to the width parameter, it gets null when the build function runs for the first time. And this will throw an exception. So it is always better to check if the value is null or not, if it is null, assign a initial value from which the animation will start.
Example
Here is another example, with the color animation:
class _TestState extends State<Test> with SingleTickerProviderStateMixin{

  AnimationController _controller;
  Animation<double> opacityAnimation;
  Animation<double> widthAnimation;
  Animation colorAnimation;

  @override
  initState(){
    super.initState();
    _controller = new AnimationController(
      duration: const Duration(milliseconds: 1000),
      vsync: this,
    );
    opacityAnimation = Tween<double>(begin: 0.0, end: 1.0).animate(_controller);
    widthAnimation = Tween<double>(begin: 0.0, end: 100).animate(_controller);
    colorAnimation = ColorTween(begin: Colors.yellow, end: Colors.red).animate(_controller);

    _controller.addListener((){
      setState((){});
    });

    _controller.forward(from: 0.0);

  }

  @override
  dispose(){
    _controller.dispose();
    super.dispose();
  }

  @override
  Widget build(BuildContext context){
    return BeautyBackground(
      child: Column(
        children: <Widget>[
          BackButton(),
          Expanded(
            child: Center(
              child: SizedBox(
                width: (widthAnimation.value == null) ? 0.0 : widthAnimation.value,
                height: 100,
                child: Opacity(
                  opacity : (opacityAnimation.value == null) ? 0.0 : opacityAnimation.value,
                  child: DecoratedBox(
                    decoration: BoxDecoration(
                      color: (colorAnimation.value == null) ? Colors.red : colorAnimation.value,
                    ),
                    child: SizedBox(
                      width: double.infinity,
                      height: double.infinity
                    ),
                  )
                ),
              ),
            )
          ),
        ]
      ),
    );
  }
}
CurvedAnimation
By default the Animation object will generate the inbetween values in a linear way, just like AnimationController does. You can spcify a predefined curved animation to the Animation object. To do that, pass a CurvedAnimation object to the animate() function of the Tween object. Here is an example:
Animation<double> angleAnimation = new Tween(begin: 0.0, end: pi/2).animate(
  new CurvedAnimation(
    parent: _controller,
    curve:  Curves.ease,
    reverseCurve: Curves.easeOut
  )
);
Instead of passing animation controller to the animate function, we are passing CurvedAnimation object. We need to pass the animation controller to the CurvedAnimation constructor using parent property.
The property curve specifies the Curve style when the animation is in forward mode, that means the animation is happening from begin to end. The reverseCurve property specifies the curve style when animation happens from end to begin that means in reverse mode.
To know all the available curves go to Curve documentation.
Interval
An Interval can be used to delay an animation. Interval specifies a timeline of an animation when the animation should start and when the animation should end. The first parameter is begin that specifies when the animation will start and second parameter is end which specifies when the animation will ends. It takes another optional named parameter curve which specifies the curve of the animation.
The Interval constructor returns a curve. So you can use this constructor to provide a curve in CurvedAnimation.
Animation<double> angleAnimation = new Tween(begin: 0.0, end: pi/2).animate(
  new CurvedAnimation(
    parent: _controller,
    curve: Interval(0.2, 0.5, curve: Curves.easeOut),
  )
);
But how you should provide value for begin and end parameter? Think of your animation timeline from 0.0 to 1.0. So your animation starts at 0.0 means at 0%, and ends at 1.0, means 100%. If you want your animation to happen from 20% to 70%, you should provide 0.2 for begin parameter and 0.7 for end parameter.
When the animation plays in reverse mode, the animation will start from end and ends at begin. If you use Interval for curve parameter, using reverseCurve has no effect.
The following example uses multiple animation that uses Interval:
Example
class _TestState extends State<Test> with SingleTickerProviderStateMixin{

  AnimationController _controller;
  Animation<double> opacityAnimation;
  Animation<double> widthAnimation;
  Animation colorAnimation;

  @override
  initState(){
    super.initState();
    _controller = new AnimationController(
      duration: const Duration(milliseconds: 3000),
      vsync: this,
    );
    opacityAnimation = Tween<double>(begin: 0.0, end: 1.0).animate(
      CurvedAnimation(
        parent: _controller,
        curve: Interval(0.0, 1.0, curve: Curves.easeIn)
      )
    );
    widthAnimation = Tween<double>(begin: 0.0, end: 100).animate(
      CurvedAnimation(
        parent: _controller,
        curve: Interval(0.1, 0.4, curve: Curves.easeOut)
      )
    );
    colorAnimation = ColorTween(begin: Colors.yellow, end: Colors.red).animate(
      CurvedAnimation(
        parent: _controller,
        curve: Interval(0.4, 1.0, curve: Curves.easeOut)
      )
    );

    _controller.addListener((){
      setState((){});
    });

    _controller.repeat();

  }

  @override
  dispose(){
  _controller.dispose();
  super.dispose();
  }

  @override
  Widget build(BuildContext context){
    return BeautyBackground(
      child: Column(
        children: <Widget>[
          BackButton(),
          Expanded(
            child: Center(
              child: SizedBox(
                width: (widthAnimation.value == null) ? 0.0 : widthAnimation.value,
                height: 100,
                child: Opacity(
                  opacity : (opacityAnimation.value == null) ? 0.0 : opacityAnimation.value,
                  child: DecoratedBox(
                    decoration: BoxDecoration(
                      color: (colorAnimation.value == null) ? Colors.red : colorAnimation.value,
                    ),
                    child: SizedBox(
                      width: double.infinity,
                      height: double.infinity
                    ),
                  )
                ),
              ),
            )
          ),
        ]
      ),
    );
  }
}
In the above example, the opacity animation starts at 0.0 and ends at 1.0, means the opacity will be animating during the whole duration of the animation. The width animation starts at 0.1 and ends at 0.4, means after the 10% of the animation, the width will start animating and will be at full width when the animation at 40%. After the width animation ends, the color animation begans. It starts at 0.4 to 1.0, which starts after 40% of the animation elapsed and ends when the animation is at 100%.
This way using Interval you can overlap animation, or start animation one after another. These type of animation is called Staggered Animation.
Animation Properties
value
You can use value property to get the animation value. As you can see we have already used value property to get the value from widthAnimation.
widthAnimation.value;
opacityAnimation.value;
status
Just like AnimationController, Animation has the status property which is represented by AnimationStatus enum.
Animation Methods
addListener()
You can attach a listener to the animation object so that it will be called each time the animation changes its value.
widthAnimation.addListener((){
  print("Value changed : " + widthAnimation.value.toString());
});
addStatusListener()
Just like AnimationController, you can attach a listener that will be called each time the animation object changes its animation status. This listener gets the status as the first parameter.
widthAnimation.addStatusListener((AnimationStatus status){
  switch(status){
    case AnimationStatus.forward:
      print("Animation is running in forward mode !");
      break;
    case AnimationStatus.reverse:
      print("Animation is running in reverse mode !");
      break;
    case AnimationStatus.completed:
      print("Animation has been completed !");
      break;
    default:
      print("Don't know what to say !");
  }
});